Warning
This page presents a how-to guide to replace the wishbones of the Fiat Coupe.
The wishbones are a safety-critical item of the car; if you are in any doubt about
your ability to complete the job competently you should stop now and seek professional
assistance.
This job is rated Four Spanners on a scale of five - it requires specific
tools, and a certain amount of mechanical sympathy. It will take several hours to
complete for a first-timer.
Performing the job involves jacking the vehicle and working underneath. There is
- as with all jobs of this nature - a serious risk of personal injury if you jack
the vehicle incorrectly and fail to use supplementary supports. Proceed at your own risk.
The images below all show the right hand side front suspension on a 16v NA model.
The other models are similar but differ slightly to accommodate differing brake mountings.
Parts are generally not interchangeable.
Step 1
Jack the car securely using the point at the chassis leg end, behind the rear wheel.
Apply WD40 wherever there's a likely-looking thread; the pictures below show them all.
The following images also label the major parts of the suspension.
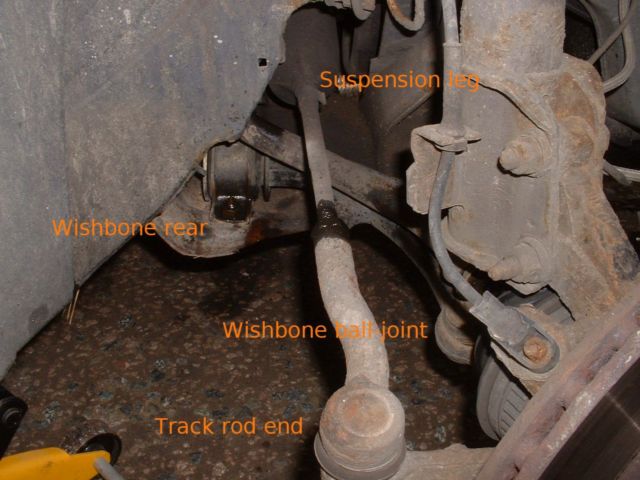
The rear of the suspension
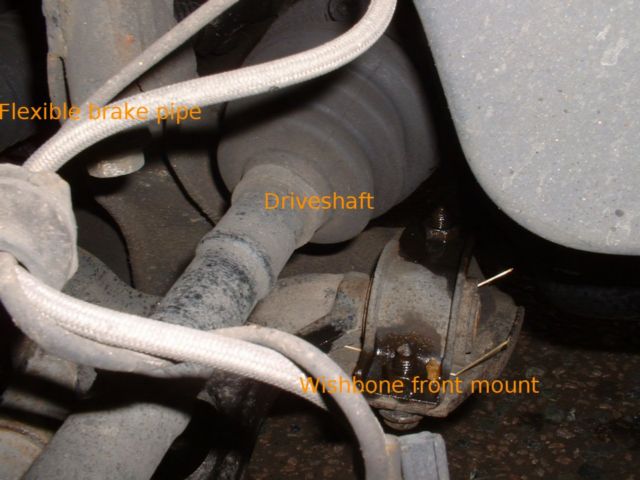
The front of the suspension
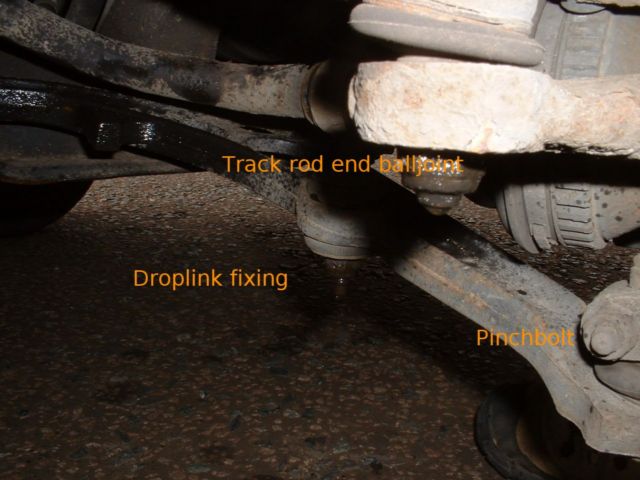
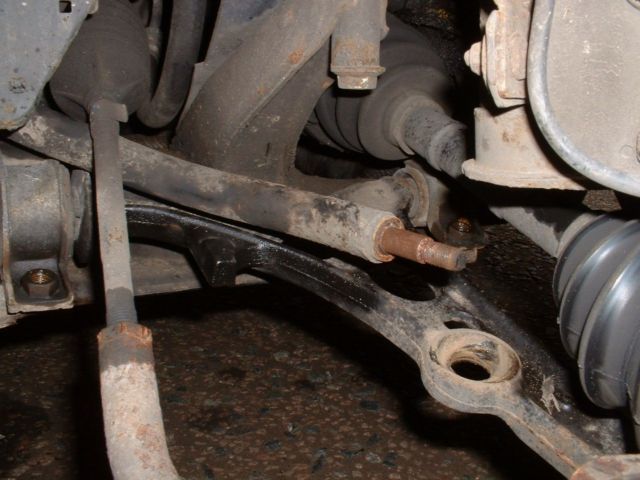
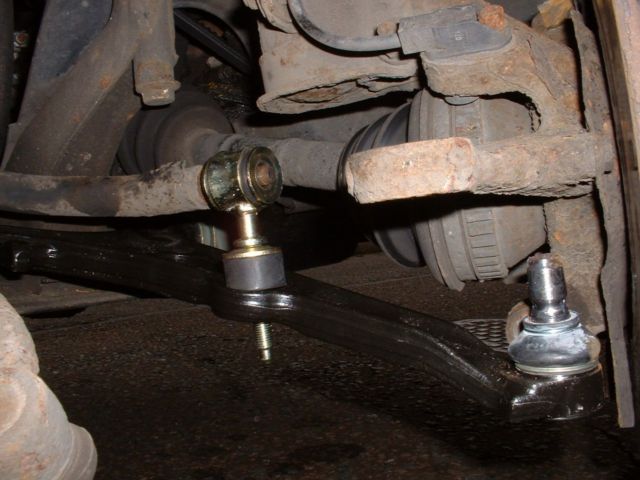
View from the rear and below
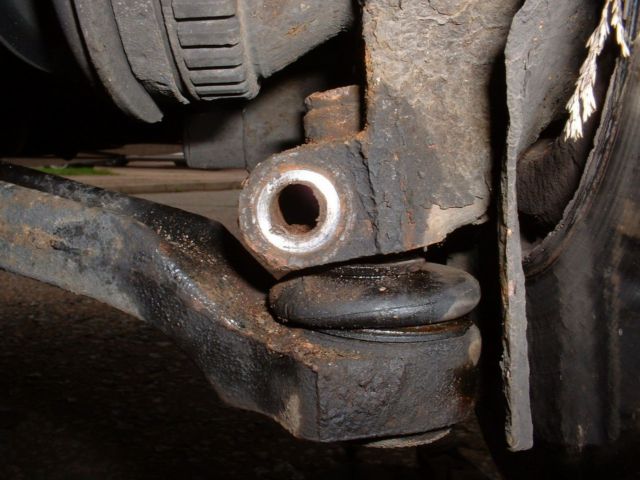
This close-up view of the swivel joint and pinch bolt indicates the correct positioning
of the hub carrier on the swivel pin. Note that this is not all the way down; there
is a groove machined in the pin through which the pinch bolt must pass. The green line
indicates the approximate shape and position of the groove.
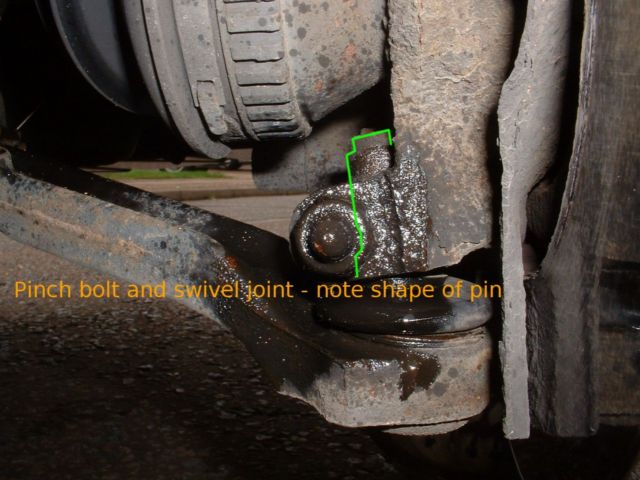
Close-up of the pinch bolt.
Step 2
Remove the nut on the bottom of the steering joint (aka track rod end) and use a joint
splitter to separate the joint. Now is a good time to replace the track rod end - while you
have it all in bits. You're going to have to have it realigned anyway, and if the bottom
joint is tired then the steering joint is also likely to be tired.
If you do intend to change the track rod end, release the lock nut on the steering rack
before you split the joint. Note that the track rod ends are handed and (usually) marked
with a letter in the casting.
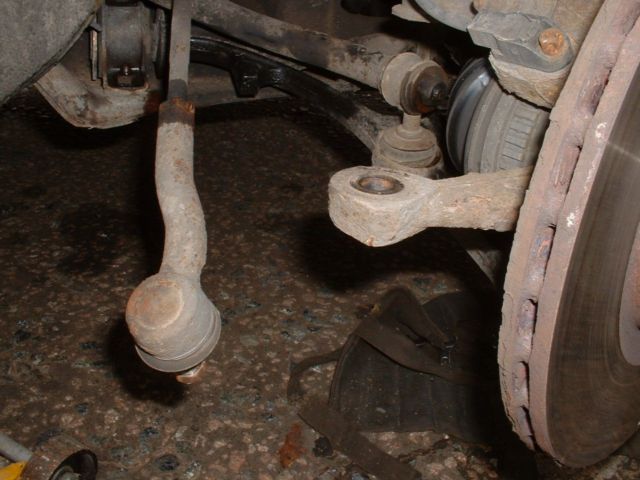
The steering joint disconnected.
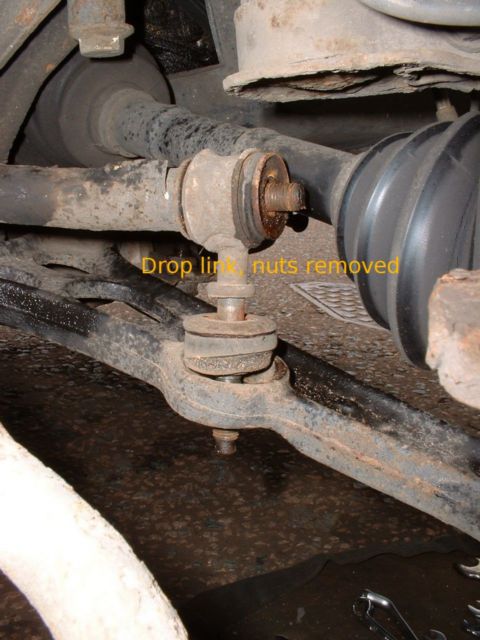
Remove the nuts from the drop link.
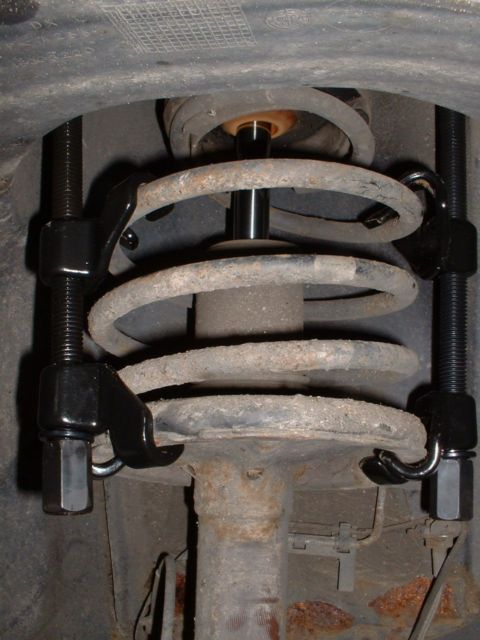
Use spring compressors to compress the suspension, taking the tension
out of the suspension leg so that it can be easily lifted.
Step 3
Now it's time to remove the pinch bolt - you may need to use a driver to push it out -
and split the main swivel. You can't fit a screw-type splitter in there; there isn't room.
A long lever will do the job, with a suitable persuader, or a fork-type splitter, though
that will probably wreck the old joint... but you're about to replace it, so no worries there.
The pinch bolt removed.
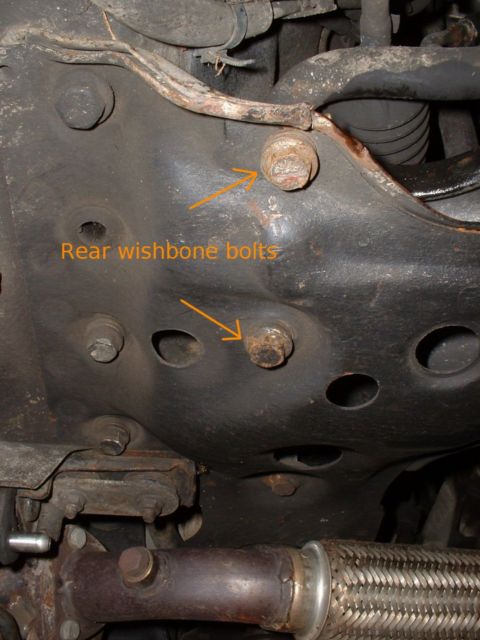
Remove the bolts at the back of the wishbone.
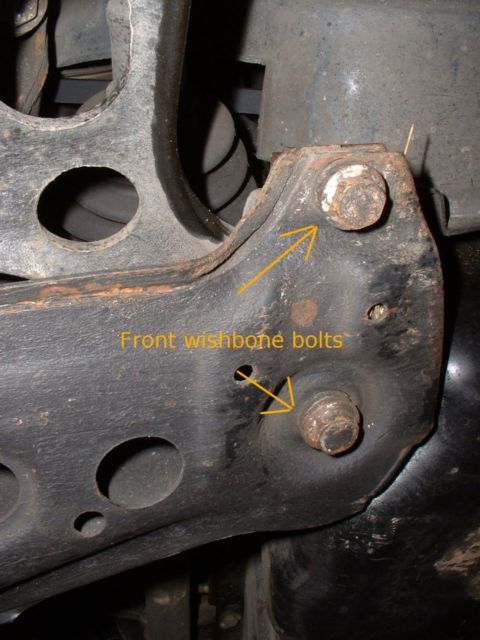
And then the bolts at the front of the wishbone.
Step 4
At this point, everything should be all loose and dangly, but still generally in place
Everything hanging loose, ready for removal.
At this point, it becomes a little tricky. I find it easiest to lift the weight of the
suspension strut on my knees. The idea is to lift it far enough to release the bottom of
the hub carrier from the swivel pin, but not to pull it out so far that the half-shaft is
pulled out of the gearbox.
Once the pin is clear, the strut can be lowered again - it will hang from the mount -
and the wishbone will wiggle free.
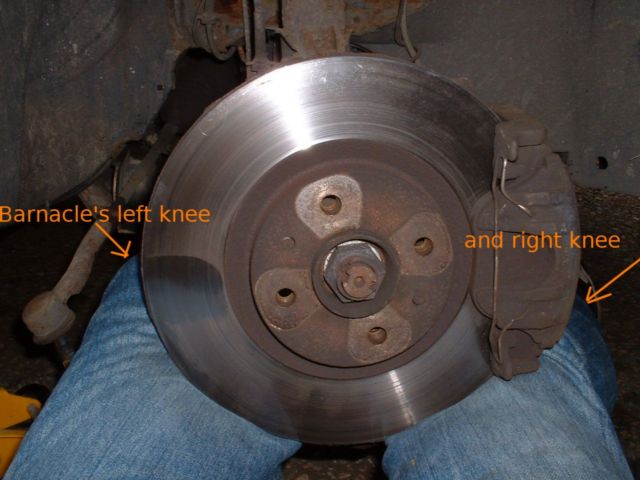
The ideal position to support the strut.

The original (pattern) arm on the left; the new Fiat original equipment on the right.
Step 5
Now comes the fun part - putting it all back together
Mr Haynes might suggest 'reassembly is the reverse of the above procedure'
but unfortunately it's not that easy.
There are a couple of methods which will work, but they both require you to get the swing
arm back approximately in place.
New bits roughly back in place.
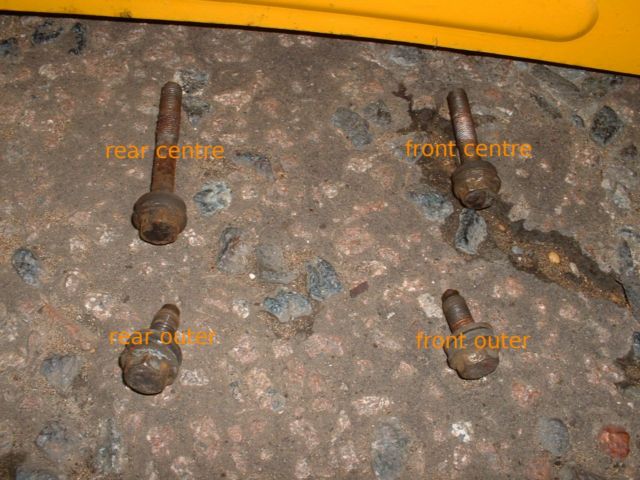
Note that the bolts are three different lenghts and must go back in the same places.
Method one - ignore the outboard end and slide the new arm into position (there's a little
ridge on the anti-roll bar mount that can make this tricky). Once it's in, wiggle the new drop
link into place but don't fasten it yet. Then loosely fasten the bolts - don't tighten them.
Then you'll need a little/lot of brute force to lift the strut high enough to get it over the swivel pin.
Method two - fasten the swivel pin into the hub carrier first, and then locate the mounting holes.
The arm will be at a steep angle which will prevent the bolts locating, so a long lever or a jack is required to
wiggle everything into place. Three arms helps, too...
Now you need to replace the drop link nuts. You'll find that the new rubbers are too fat to fit, but you can
get it on by putting the washer upside down and leaving it to settle for a while, while you replace the track
rod end bolt. If this is difficult, keep pressure on the joint to lock the pin. Now go back and replace the
washer on the drop link the right way up.
Finally, release the spring clamps and then jack the car on the suspension to take the weight of the car.
Make sure all the bolts are fully tightened with the suspension now in its normal operating position.
It is imperative that the tracking it checked as soon as possible. There is absolutely no chance of
the tracking being correct after replacement of so many parts. Failure to correct the tracking will result
in - at best - unusual tyre wear, possibly very rapidly.